Drop. Convert.
Find your sample.
A short route from an audio file to your next beat.
Guide preview
The conversion steps describe the current development build. The release download and installer are being prepared, and sales are not open. Final Mac requirements will be confirmed before purchase is available.
Set up once.
- Install the release app.
When the release is available, download the DMG from your purchase receipt, open it, and drag 1200 CONVERTER to Applications. Open the copy in Applications once. - Put a shortcut on your desktop.
In Finder, select the app in Applications and choose File → Make Alias. Move that alias to your desktop. Keep the app itself in Applications.
The release installer and first launch still need their final distribution checks. If macOS blocks the app, contact support with the message you see. Do not disable Mac security to follow this guide.
Activate once. Work offline.
The release will ask for your purchase email and license key the first time you activate each Mac. Initial activation needs an internet connection. After activation, offline use has no time limit and you do not need to enter your key again for normal use.
One personal license covers up to two Macs. Use License → Deactivate this Mac before moving a slot to another Mac. If your old Mac is unavailable, contact support with your purchase email or order number. When connected, the app can check license validity. Release activation is undergoing final distribution testing.
Then just drop a sample.
- Start with +5 → −5.
This is the initial mode for a fresh installation. Your last settings are remembered, so check the selected mode when returning to the app. - Drop one or more audio files.
Use the app icon, your desktop alias, or the dark drop area in the app. You can also click the drop area or press Command–O to choose files. The app processes queued files one at a time. - Find the new WAV.
When a row says Done, use its folder button to reveal the export in Finder. By default it is in a 1200 CONVERTER folder beside the source. Originals and existing exports are kept; repeated export names receive a number.
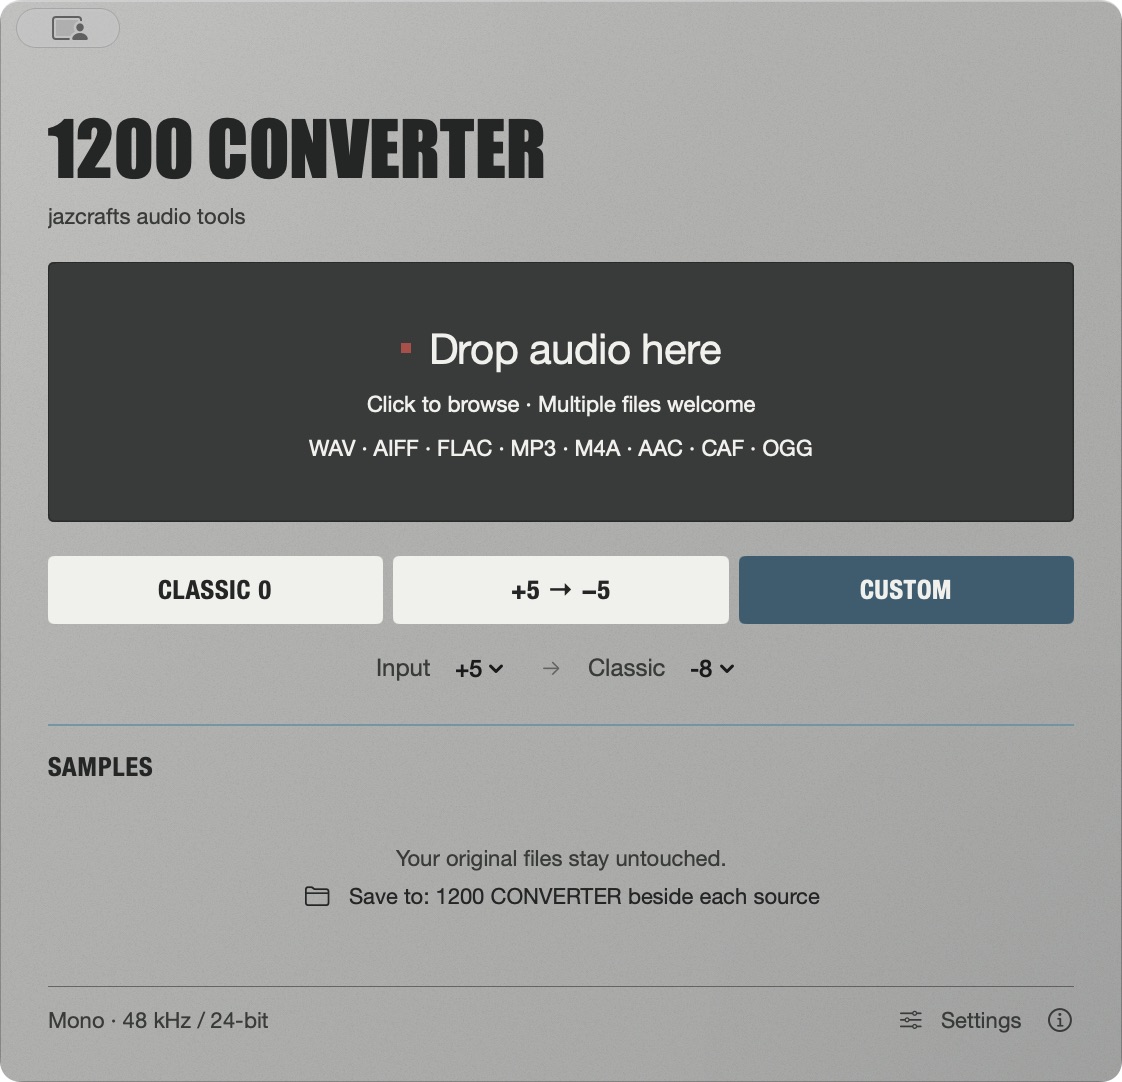
Move the exported WAV to your sampler using your usual transfer method. The app does not transfer files to hardware. Choose an export format supported by your sampler.
Only change what you need.
Settings contains the output folder, channels, sample rate and bit depth. A fresh installation uses 48 kHz / 24-bit PCM and keeps stereo; mono input remains mono. Settings are captured when a file joins the queue, so a later change applies to newly added files.
Current input and output formats
Mono or stereo audio, up to 10 minutes per file. Inputs: WAV/WAVE, AIFF/AIFC, FLAC, MP3, M4A (AAC or Apple Lossless), AAC ADTS, CAF, and Ogg Vorbis/Opus. Other codecs inside these containers may not decode. Settings → Supported input formats lists them in the app.
Output: WAV, 16-bit PCM, 24-bit PCM or 32-bit float, at 44.1, 48 or 96 kHz. Availability of a format does not mean every sampler supports it. Hardware compatibility is still being checked.
Name exports for your workflow
Settings → File naming lets you add a tag before or after the original name. Leave Tag empty for an automatic pitch tag such as Sample_IN+5_SP-5.wav. IN is the input pitch; SP is the sampler playback setting. Zero is written as IN0_SP0. With a custom tag, Include pitch settings adds these settings to the name. Your original file is kept.
CLASSIC 0, +5 → −5 and CUSTOM
CLASSIC 0 uses the sampler model at its original playback setting. +5 → −5 applies the idea of recording faster and playing back lower. CUSTOM exposes separate input and playback pitch choices. The model’s stepped playback rates mean pitch and duration are not preserved exactly, including in +5 → −5.
Current Mac build
The development build is for Apple Silicon Macs, declares macOS 13 or later, and has been checked on macOS 15.3.1. Intel support and every earlier macOS release have not been verified. This is development information; final supported systems will be stated before sales open.
If something gets in the way.
I cannot find the converted file.
Use the folder button beside a Done result. If the list is empty, check Settings for the selected output folder. With the default destination, look beside the original file for the 1200 CONVERTER folder.
The output folder cannot be written to.
In Settings, choose a folder you can write to, then add the file again. The app does not silently switch to a different destination.
A file will not convert.
Check that it is available locally, contains mono or stereo audio, and is no longer than 10 minutes. For a decoding problem, try a WAV or AIFF export from the source. If it still fails, send the error text, app version and macOS version to support. You do not need to attach your audio.
What does Clear remove?
Only completed items in the visible list. Your source audio, exports and local history remain. See local history and privacy.
Still stuck? support@jazcrafts.com
Last updated: October 7, 2026.